My Tech4Teachers blog has been moved to:
dennisgrice.com/blog
Please update your bookmarks, favorites, & blog readers.
Thanks,
-Dennis
Saturday, June 19, 2010
Monday, May 10, 2010
What I Learned From Twitter This Week
A while back, someone posted a message asking about my favorite teacher. I'm wondering if Twitter might be an acceptable answer. Now I've had some amazing teachers in my past and I mean no dishonor or disrespect to them, but when I stop and think about where I'm getting much of what I'm learning right now, I'd have to say that Twitter has been an excellent teacher - or more accurately the group brain of all those I follow on Twitter.
For example, here is just a sample of what I've learned this week...
MONDAY
From @imcguy

Thanks Chad. I too really need to take a look at my privacy settings and share this slideshow with others.
From @jgriffith2

I learned that Glogster is a great way to create and share workshop flyers. This sounds much more fun than a plain old Word document or PDF.
TUESDAY
From a retweet by @jasonschmidt123

Will definately have to forward this list to my teachers. Okay, sometimes I'm guilty of a few of these myself.
WEDNESDAY
Busy with meetings and student projects. Didn't have much time to check Twitter today. It's sad when I think about all the learning I probably missed. :(
THURSDAY
From @kditzler

I spent way too much time this morning squashing flies with this little math game.
Direct Message from @rjacklin

Thanks to Twitter, our 3rd grade was able to video chat with another 3rd grade at Rob's school near St. Louis. We shared information about our schools and communities. It was a first skype for both classes - and it won't be the last.
FRIDAY
From @wfryer

I know Steve Jobs says that iPods and iPads will not support Flash, but that didn't stop a few people from figuring out a way to make it work. Thanks for sharing this. Although until I know for sure that my confidential info was safe, I'd limit use to flash sites that don't require you enter your username and password.
Friday, April 30, 2010
The All Important Question
For those of you who don't know me, I am a technology coordinator, tech teacher, technology coach, or for lack of a better title, the guy in charge of making sure our teachers and students are using technology effectively to support curriculum. My workplace is St. John's Lutheran School in Orange, California. We are a K-8 Christian elementary school with approximately 680 students. We are currently finishing year 2 of a 3 year plan to implement 1:1 Tablet PC's in our middle school. Students in K-5 currently share a single computer lab and also have one student computer in each classroom.
Last week my principal asked me these three questions:
This was my e-mail response:
After we met on Tuesday to discuss this further, I was assigned the task of planning our professional development days for the 2010-2011 school year.
Be careful what you ask for...
(Be warned, I will be calling on my PLN for help with this.)
Last week my principal asked me these three questions:
- How you would like to see instruction change as technology develops?
- How does it transform instructional strategies?
- How do we intentionally design and train staff to accomplish the desired outcomes?
This was my e-mail response:
Yesterday I had a teacher share with me that they would really love to have some of “those mini laptops” for their classroom. When I asked why, they excitedly shared their vision of students being able to take STAR Reading, Math, and Accelerated Reader tests whenever they wanted. Seriously, if that’s the only argument for putting technology in the K-5 classrooms then my answer would be a definite “No!”. Computer based assessment is not a transformative use of technology. It’s just using a modern (and expensive) tool to do something we’re already doing.
The ISTE National Technology Standards for Students say that we should be preparing students so they can effectively use technology tools and demonstrate…
1. Creativity and Innovation
2. Communication & Collaboration
3. Research and Information Fluency
4. Critical Thinking, Problem Solving, and Decision Making
5. Digital Citizenship
6. Technology Operations & Concepts
In my opinion, we are already working on the first step toward transforming our instructional strategies through the process of curriculum mapping. Changing a mindset of “my textbook is my curriculum” to “my curriculum is my curriculum and a textbook is just a resource” is a monumental task. Once this has been accomplished then we can work on identifying lessons and activities that focus on curriculum goals and also meet these six areas of technology proficiency.
Preparing and training our staff to do this will involve tweaking a couple of other mindsets as well. First is that our students need to learn to be good citizens and demonstrate Christian morals and values in two worlds – the real world AND the online world, because they will be living and working in both. Our teachers need to be able to model and teach good digital citizenship to their students. This will involve training in web safety, appropriate use, and how to integrate our Online Behavior Agreement (PDF) into their Christian Learning curriculum and any lessons that involve using technology.
Second we need to help them understand that all learning and knowledge is not limited to the walls of their own classroom. They need to be connecting and collaborating with other people (subject matter experts) and classes outside our school, state, or even country. To do this, teachers need to develop their own Personal Learning Network (PLN) – an online community of professional educators for sharing ideas & lessons, getting support, and working together on projects. This will require moving beyond email and training them to use and integrate online collaborative tools and social networks into their daily life. It will also require some cooperation with our IT Department, convincing them to open up some of the restrictions currently prohibiting such tools. If our staff understands and demonstrates proper use of the tools and can use them effectively to help our students meet the ISTE Standards, this should not be a hard sell.
After we met on Tuesday to discuss this further, I was assigned the task of planning our professional development days for the 2010-2011 school year.
Be careful what you ask for...
(Be warned, I will be calling on my PLN for help with this.)
Sunday, April 25, 2010
Not Worth The Hassle
Sometimes it seems like getting anything done on our school network is like being forced to make three left turns in order to go right. I understand filters, firewalls, and proxies are pretty much a necessary evil when using a network at school, but they are also key source of frustration for a teacher trying to work with technology in their classroom - right behind the dreaded "I can't print".
At our school we have a "wonderful" (quotes intentional) product called iPrism which serves as our web proxy and Internet filter. Teachers have the ability to override a blocked web site. Students do not. Our IT administration also has the ability to make exceptions for sites that are blocked by the default iPrism filter which updates regularly. This sounds like a fair system and one that should work pretty well. Not always.
The fact is, with many web 2.0 tools, simply allowing or unblocking a site is not always enough. There are issues with firewalls, ports, and other mysterious network authentications and protocols that can take a simple online task and turn it into a complicated process of ridiculous steps and meaningless procedures. Something that should take one click, now takes 3, 4, or 5 clicks and require several proxy authentications just to get it to work. Unfortunately, many teachers give up before they get that far. "It's just not worth the hassle."
This is one of my major stumbling blocks in getting our teachers to embrace and use technology tools with their students. Most genuinely want to, but when they try it doesn't work. I'll come in their room and explain to them, "Well, if you want it do that, you first have to close this, click here, sign-in here, open that, click here and click OK. Then it should work."
"Why do I have to do all that?" They ask, looking at me as if I just told them to turn around three times, pat your head and rub your stomach.
"You just do." I say.
"It's just not worth the hassle."
If I may, let me present just a few of my network frustrations. Maybe you've run into one or more of these problems yourself.
(By the way, If you have any insight into ways to make these work please leave a comment or e-mail me so I can help our IT troubleshoot these issues.)
Automatic Software Updates - Ever get those little messages when you first start up your computer that Flash or Java are ready to be updated? Even if the computer is properly logged into on to our school domain, these updates do not work. To get them to go, you first have to open Internet Explorer (not Firefox) and go to any web page that is outside our network. After that, you close Internet Explorer and the update will work. Even though the computer is properly logged on to our network, there is something that Internet Explorer does (and Firefox does not) that opens up a connection through the iPrism that then allows these updates to connect through the proxy. What does it do? I don't know. Is there a way to open this connection automatically when you log on the network. I haven't found one yet.
Diigo - One morning I discovered that our latest iPrism update had blocked Diigo. I convinced our IT Administrator to make an exception for it so now it works - sort of. I can get to Diigo, look at my library of bookmarked sites, but I cannot create any new bookmarks. When I try, I just get a Diigo Server error.
Discovery Education Streaming - Many of our teachers use Firefox as their default browser, but if they try to watch a streaming clip it won't play. The workaround for this is the same as the one for automatic software updates above. Close Firefox, open Internet Explorer, go to a random site outside our network, and close Internet Explorer. Go back to Firefox, log into Discovery Streaming, and the video will now play just fine. Even though Firefox is configured to work with our iPrism proxy, Internet Explorer must do something else that opens up a connection for streaming media.
Flash Apps that run in a web browser (ed.voicethread, Glogster Edu, etc.) - These Web 2.0 tools are not blocked, but they don't completely work either. You can't always upload images, sounds, video, or other files. It looks like the upload is working but it never finishes. Clearing out the temporary Internet files and cookies will fix this sometimes, but not always. Sometimes uploading only works with Internet Explorer - but not always.
Glogster Edu - has a "Grab" tool that lets you record voice or video directly within the application, but that tool has never worked here at school no matter what browser you're using. You just get an error saying it can't connect.
Are these proxy authentication errors? Is our firewall blocking things that these apps need to connect? Why should I have to use Internet Explorer for some sites and Firefox for others? I don't know. What I do know is if I want our teachers and students to be able to use these tools at school we need to do something to make it easier and more reliable, otherwise I fear using the technology will "not be worth the hassle."
Sunday, April 18, 2010
The Smell of Education
After a little Twitter conversation I had this evening, I felt the need to reflect in a few more than 140 characters.
A smell can be one of the most powerful memory triggers. Do you remember what school smelled like when you were a child? Here are just a few odors that bring back images from my school days. See if any of these bring back memories for you...

I wonder what smells our students will remember?
A smell can be one of the most powerful memory triggers. Do you remember what school smelled like when you were a child? Here are just a few odors that bring back images from my school days. See if any of these bring back memories for you...
- Opening a new box of Crayola crayons.
- Flipping through the pages of a dusty old World Book Encyclopedia.
- Paste. (The kind with the stick in the lid.)
- Tempera paint. (Especially if it has gone bad.)
- White out.
- Chalk dust. (Ever have the job of cleaning the erasers?)
- A paper handout fresh out of the ditto machine.

I wonder what smells our students will remember?
Thursday, April 15, 2010
KISSS my PD
If I had my way, I'd never lead another mandatory, all staff, technology in-service at my school ever again. Simply put, they're a waste of time and they don't work. First, there's a problem with focus. More often than not, the focus of all-staff PD is on the tool, not the curriculum. Second, it implies a cookie cutter, one-size-fits-all approach to professional development. Have you ever been in a room full of teachers at an in-service!? If there was ever a more diverse group of learners I have yet to see it. You think your students need differentiated instruction? Teachers need it even more!
That's why I've adopted the KISSS Principle for professional development. Keep it...Small, Short, and Specific.
SMALL - I'm talking small group. Rather than work with a room full, select a single grade level. At my school, that's 3 teachers. Then, before I start talking, I listen. I listen to find out what they are teaching. What are their learning goals? These answers differ greatly between grade levels and departments.
SHORT - Teachers' free time is valuable and they get precious little of it. Try to respect that. Rather than one long session, I've found it's better to do short mini-sessions before and after school. Fellow tech educator Suzanne Wesp has a program at her school called "Lunch & Learn" where teachers come in during their lunch for mini lessons.
SPECIFIC - Keep the training specific and focused on the curriculum standard. For me, the first sessions are more just casual conversations where we talk curriculum and I find out what these teachers are doing. Next I come in and demonstrate a "learning tool" or "project" that will help their students meet a specific learning goal or standard. Finally I work with them to develop a lesson that will help their students meet that standard. The goal of the training is to give the teachers something they will use tomorrow or next week. If I can get this lesson into a teacher's lesson plan book I know I've struck gold because once it's in there, it will likely become a regular part of their classroom curriculum.
Things to remember for successful teacher training:
Focus on the curriculum, not the technology tool. I try not to even use the words "technology" or "Web 2.0" when working with teachers. Instead I use "learning tool" or "web site". Technology is MY passion, not theirs. Don't intimidate with terminology.
Be there when they teach the lesson for the first time. This provides that much needed safety net when trying something new. In some cases I'll even team teach with them, letting the teacher present the curriculum while I show how to use the tool. If I can't be there, sometimes I'll create tutorial videos or screencasts for the teacher to use.
Follow-up. Meet with them after the lesson. Discuss how it went. What worked? What didn't? Discuss and make notes on how it can be improved next time. The important thing here is to make sure there WILL be a "next time".
Share successes. Rushton Hurley (www.nextvista.org) has said, "Great things are going on in our classrooms and nobody knows about it." Take time to share great lessons and student work with other teachers. Others might see it and say, "Hey, I can do that!"
"To Infinity and Beyond!"
As teachers use the technology...er...i mean..."learning tools" they will require less and less help from me. Better yet, they become "experts" on using that tool. If I have another teacher that wants to learn it, I can say, "You should go talk to so-and-so. They use that tool all the time with their class." My long term plan is to develop a network of experts on various tools at my school. Eventually some teachers may even feel comfortable sharing their expertise with others outside our school.
The biggest compliment I think I could ever receive is seeing a teacher that I helped present at a conference. It hasn't happened yet, but we're getting close.
ADDITIONAL RESOURCES:
Education is a Team Sport
Tutorial Videos? Okay, show me an example. Here you go: PhotoStory Animal Riddles
Wednesday, March 03, 2010
A More Human Way to Travel - Part 2
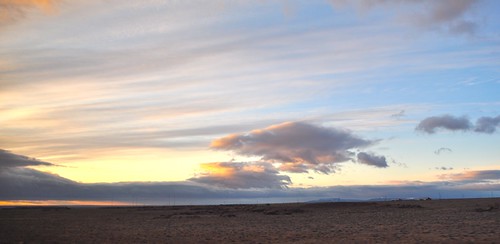
Climbing through the mountains near Santa Fe we ran into snow flurries so I didn’t get great view out the window for the prettiest part of the trip, but the falling snow was a treat in itself. One thing I’ve really come to appreciate about train travel is the quiet. In my compartment with the door shut, it’s quite peaceful. Unlike an airline, there’s no engine noise and unless you’re moving between cars you don’t even hear the “clackety-clack” of the tracks. Even though I bring stuff to read and typically make plans to use all that time on the train to get work done, I usually end up just sitting, staring out the window, watching the world go by. Before I realized it, we had crossed over Raton Pass and into Colorado. It was already getting dark again.
After dinner I retired to my roomette, worked a little more on my presentation then found Rene to get the room ready for sleeping again. Knowing I would lose another hour overnight I set the clock on my Blackberry ahead to Central time and turned in.
The tracks were a bit rough through Kansas overnight. As I rocked in my bunk I dreamed I was riding the luge down the Olympic course at Whistler. After breakfast we stopped in Kansas City for about 40 minutes. I had time to walk around and take a few pictures inside the beautiful Kansas City Union Station. If you’ve ever been to Union Station in Washington DC, it’s a bit smaller, but similar. As I stepped out front to get a few exterior pictures I saw Barb. Her trip was over and she was waiting for her ride. I told her it was a pleasure traveling with her, wished her a safe journey home, and made my way back to the platform.

Leaving Kansas City we crossed the Missouri River. The rest of the way to Chicago, I saw a lot of snow. It was everywhere - on the ground, in the trees. It blew past my window as the engine stirred up whatever was lying on the tracks. We passed countless farms and rolled through several small towns as we made our way across Missouri. At one stop in La Plata, MO I noted that you know you’re in rural America when the only vehicle waiting at the railroad crossing is a John Deere.
At Fort Madison, Iowa we crossed the mighty Mississippi into Illinois. My last meal on the train was with a couple from Kansas on their way to Chicago for a little vacation. She was a retired Kindergarten teacher. Funny how I keep running into teachers. We shared school experiences and I talked about ways education has changed over the years (and how it hasn’t). I also explained some of the things I planned to teach in my ICE presentations.
Passing through Princeton & Mendota, I knew my journey on the Southwest Chief would soon be coming to an end. As I gathered my things Rene came by to help. Naperville was the last stop before downtown Chicago. Since my conference was in St. Charles, it made sense to arrange for transportation from there. I found my way downstairs as the train slowed to a stop. Rene opened the door and placed my bags on the platform and I thanked him for making the trip an enjoyable one.
As the train pulled out of the station on it’s way downtown, I meandered toward the front of the station where my friend Anne was waiting for me. My 42 hour Amtrak trip to Chicago was now officially over.
EPILOGUE:
The train arrived in Naperville, Illinois 15 minutes early. My flight back to California the next Saturday was over 2 1/2 hours late due to mechanical problems. As I stood in the security line at O’Hare with my shoes off, laptop out, and carry-on ready for inspection, I noticed ads for Amtrak pasted to the bottom of those plastic bins at the x-ray. The modern day equivalent of “Next time, take the train.” You don’t have to tell me that.
After dinner I retired to my roomette, worked a little more on my presentation then found Rene to get the room ready for sleeping again. Knowing I would lose another hour overnight I set the clock on my Blackberry ahead to Central time and turned in.
The tracks were a bit rough through Kansas overnight. As I rocked in my bunk I dreamed I was riding the luge down the Olympic course at Whistler. After breakfast we stopped in Kansas City for about 40 minutes. I had time to walk around and take a few pictures inside the beautiful Kansas City Union Station. If you’ve ever been to Union Station in Washington DC, it’s a bit smaller, but similar. As I stepped out front to get a few exterior pictures I saw Barb. Her trip was over and she was waiting for her ride. I told her it was a pleasure traveling with her, wished her a safe journey home, and made my way back to the platform.
Leaving Kansas City we crossed the Missouri River. The rest of the way to Chicago, I saw a lot of snow. It was everywhere - on the ground, in the trees. It blew past my window as the engine stirred up whatever was lying on the tracks. We passed countless farms and rolled through several small towns as we made our way across Missouri. At one stop in La Plata, MO I noted that you know you’re in rural America when the only vehicle waiting at the railroad crossing is a John Deere.
At Fort Madison, Iowa we crossed the mighty Mississippi into Illinois. My last meal on the train was with a couple from Kansas on their way to Chicago for a little vacation. She was a retired Kindergarten teacher. Funny how I keep running into teachers. We shared school experiences and I talked about ways education has changed over the years (and how it hasn’t). I also explained some of the things I planned to teach in my ICE presentations.
Passing through Princeton & Mendota, I knew my journey on the Southwest Chief would soon be coming to an end. As I gathered my things Rene came by to help. Naperville was the last stop before downtown Chicago. Since my conference was in St. Charles, it made sense to arrange for transportation from there. I found my way downstairs as the train slowed to a stop. Rene opened the door and placed my bags on the platform and I thanked him for making the trip an enjoyable one.
As the train pulled out of the station on it’s way downtown, I meandered toward the front of the station where my friend Anne was waiting for me. My 42 hour Amtrak trip to Chicago was now officially over.
EPILOGUE:
The train arrived in Naperville, Illinois 15 minutes early. My flight back to California the next Saturday was over 2 1/2 hours late due to mechanical problems. As I stood in the security line at O’Hare with my shoes off, laptop out, and carry-on ready for inspection, I noticed ads for Amtrak pasted to the bottom of those plastic bins at the x-ray. The modern day equivalent of “Next time, take the train.” You don’t have to tell me that.
A More Human Way to Travel
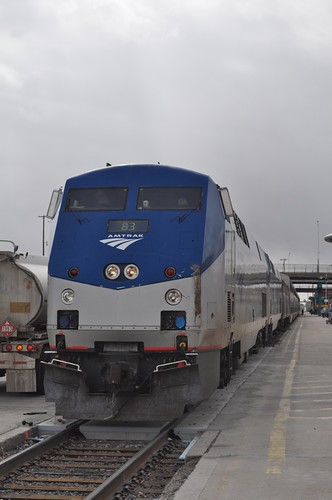
I’ll be taking a departure away from technology issues for the next few posts to submit another online journal of another train trip across the country. This time I used the 2010 ICE Conference in St. Charles, Illinois as an excuse to ride the Southwest Chief.
When you ride the train they know you by name. At least your sleeping car attendant does. Rene was in charge of car 430. “Mr. Dennis”, he called me looking at his passenger list as I boarded the Southwest Chief in Fullerton, California eastbound to Chicago. He lifted my large bag up onto the lower baggage rack and directed me upstairs to my compartment. I was in roomette #5. The roomette is a small compartment with two seats facing each other and a sliding glass door & curtain for privacy. By the time I set my backpack and coat down on one seat and plopped myself down on the other I realized we had already started moving. I barely noticed. “They’re still serving dinner.” Rene advised, “You should go get something to eat.”
It was 7:20pm. If I had known they would be serving dinner that late I wouldn’t have eaten that burger before arriving at the station. Meals are included in when you purchase a sleeping compartment. Entering the dining car, Annie, the dining car steward directed me to my table. Amtrak dining cars are community seating, so you get to know your fellow passengers during meal times. Next to me sat Barb, who got on with me in Fullerton. Her compartment was right across the hall from mine. She was traveling back home to Kansas City after visiting her grandchildren in San Diego. The gentleman who sat across from us was a businessman “training” his way to back to the East Coast. We introduced ourselves and shared about our occupations. The ribs and chicken looked good, but since I had already eaten I opted for just coffee and slice of cheesecake. Over the meal we had a lively discussion over ways deal with the glut of information online, the need for "fact-checking", and how to teach kids to determine bias. We agreed that the loudest opinion is believed and shared more often than the actual truth.
By the time dinner was over we were already past San Bernardino
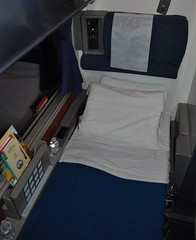 and heading up Cajon Pass. I was about ready to turn in for the night and before I could ask, Rene was there. In less than 2 minutes he had converted my two seats into one bed. When the sleeper is made up it’s about as wide and long as a standard sleeping bag. With the slider to the compartment shut and curtains pulled I had about 12 inches of space between the bed and the door. Not much room to change, but I managed. I suppose I could have used the changing room downstairs. Maybe tomorrow. This was my third overnight train trip, but the motion of the car and the unfamiliar surroundings still took a little getting used to. I woke up several times but eventually found my way to dreamland.
Shortly after 5:00am it was still dark when the train stopped in Flagstaff. I woke to look out my window and see snow - lots of it. I snapped a couple of pictures and debated going back to sleep, but then realized my time was wrong. Blackberry’s don’t update the clock when you change time zones. It was already after 6:00am. Time to get up.
Showering on a moving train can be a challenge. Each sleeping car has a changing room with a shower. It’s like a glorified RV shower. Amtrak provides towels & soap. You set the temperature and press the button for about 45 seconds of water. It took a few presses to get hot water - I never really got the temperature right. The water pressure was pretty weak but after several presses at least I felt clean and somewhat refreshed which is more than I can say for my fellow passengers in coach. One man who got on with me at Fullerton was headed all the way to Rhode Island in coach. All I remember thinking was, “Good luck, pal.”
The dining car opened at 6:30am for breakfast. The sun was just coming up as we rolled East across Arizona. Barb was at my table again for breakfast. She had travelled on the Southwest Chief several times before so I asked her to advise me where the prettiest part of the trip might be. She told me my best photo opportunities would be climbing through the mountains near Santa Fe and into Colorado. While we ate, the train made a quick stop in Winslow. I did a quick check to see if I could see anyone standing on a corner - taking it easy. Nope. The train moved on.
9:00am. Crossing into New Mexico there was snow on the ground once again. After passing through Gallup, I grabbed a cup of coffee from the coffee & juice station at the center of my sleeping car and tried to get some work done on my presentation for the ICE Conference - my excuse for taking this train in the first place. Rene had already changed my room from a bed back into two seats. Each room has a power outlet so I plugged in my computer and was able to get online by tethering it to my Blackberry. I tried pushing my luck to see if I could Skype with Jen Wagner so she could give me some advice on my presentation. We got a few words in, but the connection kept dropping, so I went back to texting.
 Lunch time. We pulled into Albuquerque 20 minutes early. That gave me over an hour to explore before the train was scheduled to depart. I walked around for a bit but got hungry. “Back so soon Mr. Dennis?” Rene asked as I climbed back into car 430. “The dining car is empty if you want to eat lunch.” My thoughts exactly.
This time my meal companions were a couple of seasoned train travelers, one a retired college professor, on their way to New York. Teachers always have stuff to talk about and before I realized the hour was up and the train was moving once again.
Go to PART 2
Subscribe to:
Posts (Atom)


