Back in November 2007 I posted a "Not So Simple Solution" demonstrating a fairly complicated way to take projects created in Microsoft PhotoStory3 and make them viewable on Macs.
While brainstorming a way to share our 3rd grade Animal Riddles online (thanks Jennifer Gingerich for the project idea) I tried uploading the wmv files created by PhotoStory directly into Voicethread - AND IT WORKED!
Now we can not only share our students' PhotoStory projects, but putting them on Voicethread allows us the option to let others comment back. Nice!
Below is an example. (Until I get an OK from the teacher I've turned off commenting.)
Showing posts with label photostory. Show all posts
Showing posts with label photostory. Show all posts
Thursday, June 04, 2009


Wednesday, February 18, 2009
Bigger Isn't Always Better
ITSC is small compared to other state or regional conferences - only about 400 attendees - but I really like how they put it together. The three hour workshops really encourage conversation and allow time for reflection. It's also a great opportunity to hear and interact with some pretty amazing presenters on a more intimate level. Having access to these presenters both during and outside of their sessions is a real treat and facilitates some great conversations.
Speaking with Jennifer Arns, the Program Director, I learned that at ITSC they really want schools and districts to attend in teams and they provide teams with time to meet and discuss what has been learned periodically throughout the conference. This time to process what has been learned and brainstorm how it can be applied is quite valuable and unfortunately pretty unique in educational conferences. The fact that they can actually get this many teachers to take their President's Day weekend to attend speaks to the importance these educators place on using technology tools to improve instruction.
Here are some thoughts from sessions and conversations:
Cell Phone Digital Storytelling - Wes Fryer
I've created podcasts from my cell phone using GCast, but another tool called Gabcast adds the ability to post from not just MY cell phone, but ANY phone.

With this tool, teachers can create multiple channels for different classes, then give students the phone number and access code so they can just call in and record their thoughts & stories, posting them to the class podcast. At our tables we brainstormed how this could transform a class field trip by directing students to use their cell phones to take pictures at certain locations and record and post their thoughts on what they see, what they experience, and what they learn. These images and audio files are captured "on location", and can later be combined into digital stories using any number of media tools.
The best part? There's no need for the school to supply students with expensive camera or recording equipment, most already have what they need to collect their stories.
Historical Documentaries - Jennifer Gingerich
Using familiar tools like PhotoStory3, iMovie, and GarageBand, students take "digital kits" and use them to create documentaries from periods in history. Jennifer worked with our group to create a pretty impressive Ellis Island story in just a matter of minutes. She also shared student created Oregon Trail diaries. These documentaries are written in first person, using images from the kit, or photos taken of students in costume with a sepia tone effect to give an "antique" look.
The digital kits contain music, photos, citations and other components needed to create the stories. For the students, the focus is not on teaching them how to find pictures or make videos, but seeing how well they know the content and can tell a story. The emphasis is on writing and historical accuracy. The advantage of digital stories over a written report? Stories not only capture the facts of the time period, but give kids an opportunity to put themselves in the place of these people and consider what they must have thought and how they must have felt - connecting them to the history on an emotional level rather than just a factual one.
Wii Whiteboard - John Sperry
I've seen Johnny Lee's video on YouTube, but here I got to actually see, feel, and try it out for myself. John Sperry from Springfield, Oregon demonstrated how easy and inexpensive it is to make your own interactive whiteboard using a Wii Remote. Time to dust off my soldering iron and go into project mode. I may have to take John up on his offer and send him a empty Expo marker so he can transform it into an infra-red pen.
Bend/LaPine School District - Amy Lundstrom
Amy Lundstrom is a technology program developer for Bend/LaPine School District. She's also the one that suggested I take an extra day or two to attend this conference. I'm so glad she did.
Speaking with her between conference workshops I learned how she is working with teams of teachers in her district, facilitating development of standards-based lessons that integrate technology. One unusual thing they do is give teachers an opportunity to observe their own class during one of these lessons. Through this "Lesson Study" program, members of these teams take turns teaching and observing each other's classes. The purpose of these observations is to determine 1) Do all students have access to the content being taught? 2) Did technology help students acheive the standard? In addition to observing the whole class, the classroom teacher can identify specific students in their own class to be observed. Observers are directed to be "human video cameras" noting how these students act during class and determining if those actions indicate motivation. After class, these students' work product is also evaluated. This program gives classroom teachers a unique insight into how particular students are affected by these newly developed lessons and technology tools. Ultimately it helps these teachers become more comfortable and confident planning and implementing technology infused lessons with their classes.
Speaking with Jennifer Arns, the Program Director, I learned that at ITSC they really want schools and districts to attend in teams and they provide teams with time to meet and discuss what has been learned periodically throughout the conference. This time to process what has been learned and brainstorm how it can be applied is quite valuable and unfortunately pretty unique in educational conferences. The fact that they can actually get this many teachers to take their President's Day weekend to attend speaks to the importance these educators place on using technology tools to improve instruction.
Here are some thoughts from sessions and conversations:
Cell Phone Digital Storytelling - Wes Fryer
I've created podcasts from my cell phone using GCast, but another tool called Gabcast adds the ability to post from not just MY cell phone, but ANY phone.

With this tool, teachers can create multiple channels for different classes, then give students the phone number and access code so they can just call in and record their thoughts & stories, posting them to the class podcast. At our tables we brainstormed how this could transform a class field trip by directing students to use their cell phones to take pictures at certain locations and record and post their thoughts on what they see, what they experience, and what they learn. These images and audio files are captured "on location", and can later be combined into digital stories using any number of media tools.
The best part? There's no need for the school to supply students with expensive camera or recording equipment, most already have what they need to collect their stories.
Historical Documentaries - Jennifer Gingerich
Using familiar tools like PhotoStory3, iMovie, and GarageBand, students take "digital kits" and use them to create documentaries from periods in history. Jennifer worked with our group to create a pretty impressive Ellis Island story in just a matter of minutes. She also shared student created Oregon Trail diaries. These documentaries are written in first person, using images from the kit, or photos taken of students in costume with a sepia tone effect to give an "antique" look.
The digital kits contain music, photos, citations and other components needed to create the stories. For the students, the focus is not on teaching them how to find pictures or make videos, but seeing how well they know the content and can tell a story. The emphasis is on writing and historical accuracy. The advantage of digital stories over a written report? Stories not only capture the facts of the time period, but give kids an opportunity to put themselves in the place of these people and consider what they must have thought and how they must have felt - connecting them to the history on an emotional level rather than just a factual one.
Wii Whiteboard - John Sperry
I've seen Johnny Lee's video on YouTube, but here I got to actually see, feel, and try it out for myself. John Sperry from Springfield, Oregon demonstrated how easy and inexpensive it is to make your own interactive whiteboard using a Wii Remote. Time to dust off my soldering iron and go into project mode. I may have to take John up on his offer and send him a empty Expo marker so he can transform it into an infra-red pen.
Bend/LaPine School District - Amy Lundstrom
Amy Lundstrom is a technology program developer for Bend/LaPine School District. She's also the one that suggested I take an extra day or two to attend this conference. I'm so glad she did.
Speaking with her between conference workshops I learned how she is working with teams of teachers in her district, facilitating development of standards-based lessons that integrate technology. One unusual thing they do is give teachers an opportunity to observe their own class during one of these lessons. Through this "Lesson Study" program, members of these teams take turns teaching and observing each other's classes. The purpose of these observations is to determine 1) Do all students have access to the content being taught? 2) Did technology help students acheive the standard? In addition to observing the whole class, the classroom teacher can identify specific students in their own class to be observed. Observers are directed to be "human video cameras" noting how these students act during class and determining if those actions indicate motivation. After class, these students' work product is also evaluated. This program gives classroom teachers a unique insight into how particular students are affected by these newly developed lessons and technology tools. Ultimately it helps these teachers become more comfortable and confident planning and implementing technology infused lessons with their classes.
Wednesday, June 04, 2008
Tide Pool Adventure
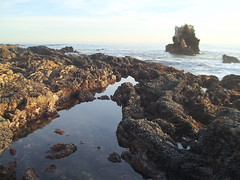 Every May our 5th graders take a field trip to the tide pools at Corona Del Mar to learn about marine life. Part of the follow up for that trip includes some sort of assignment about various tide pool animals that reside in our local marine habitat.
This year as part of my effort to promote creativity and digital storytelling, we decided to shake things up a bit. Each child was to select a creature from the tidepools and make a story about that creature. They would give it a name, talk about it's life in the tidepool, or tell a story about their creature's little adventure. Stories must be factually accurate and cannot include any plot elements that go beyond the creature's natural abilities, real life predators, or physical environment. (i.e. No "Sea Slugs in Space" stories.)
The project began with students sketching out their stories in class on a storyboard template. (Storyboard.pdf courtesy of Hall Davidson) Storyboards included the story's "script" - what the student would say for each image. Next, they began to work on their pictures in the computer lab. Pictures could be drawn in KidPix, created in PowerPoint and exported as a jpeg file, imported from the Internet (properly cited, of course), or any combination of the three.
Finished pictures were imported to PhotoStory3. Students recorded their narration and added music and titles. When the stories were finished, they were exported to a Windows Media file and submitted electronically to their teacher for grading using our school LMS.
Were we crazy to start a project like this with only 8 1/2 days left in the school year? Maybe, but nearly all the kids were able to complete and submit their projects by this morning's deadline. (School ends this Friday!) They will be sharing them in class this afternoon.
Here is one about Brittle Stars.
This is a story about two crabs that sneak out to do some "TP-ing" with seaweed.
NOTE: Because of the limited time available to complete the assignment, students were limited to three pictures for their stories. But even with that restriction, they were still able to come up with some pretty good projects. Hopefully next year we'll be able to give them a little more time.
PHOTO CREDIT: Judykay (flickr.com/photos/judykay/290095974)
Monday, February 18, 2008
iMovie 08: PhotoStory for Mac?
For a PDF (printable) version of this blog click here.
Microsoft PhotoStory 3 is a great, simple way for students and teachers to create their own digital stories. I’ve demonstrated PhotoStory at several workshops and conferences and every time I do someone always asks, “Isn’t this available for Mac?” I understand the shock that Mac users experience when I tell them, “No, it’s only for Windows.” We Mac users are used to having the best, and easiest to use software. We feel slighted when something comes along that’s simple, easy, free, and we can’t have it. This is especially painful when that product comes from Microsoft.
“No. No. That’s not true! That’s impossible!”
Luke Skywalker, reacting to Darth Vader’s revelation that he is Luke’s father
For those of you who have been wanting a Mac solution to the PhotoStory dilemma, here’s something that might just work. It’s iMovie ‘08. This latest version of iMovie has drawn numerous bad reviews, mostly due to the fact that it is radically different from it’s previous version. While I’m not going to argue which is better, please allow me to present iMovie 08 as an alternative to PhotoStory. Here is an example of how to create a simple digital riddle using iMovie 08. I’ve written the steps in much the same way that similar project would be created using Photostory.
Since today is Presidents’ Day, I’m choosing to create a digital riddle about one of our Presidents, Millard Fillmore. Before starting this project I collected two pictures and placed them in a folder. One is a blank slide that I will use a background for my titles. The other is a photo of Millard Fillmore that I plan to use several times. The idea is to zoom in on certain parts of the picture and only reveal the entire photograph at the end.
Start a New Story

Go to FILE and select NEW PROJECT.
If you want your project to be a standard video format, I suggest you select a Standard (4:3) aspect ratio.
STEP 1: Import Pictures
You can bring your pictures into iMovie two ways. If they’re already in your iPhoto library, click the camera button (at the right of the screen below the preview window). Locate your pictures and drag them to the project window.
For my project, I'm saving two pictures - a blank background created in keynote and the picture of Millard Fillmore - in a folder. I can drag the pictures from the folder into the project window.
Since I want to use each picture more than once, I can drag the same picture multiple times to create copies.

STEP 2: Add Titles
Click the title button (located next to the camera button).
Select the style of title you want and drag it on top of a picture. For my President riddle I’m selecting a centered title for my questions and a lower third for my answer.

Type your titles in the preview window. You will notice that each picture with titles has a blue bar over it.
STEP 3: Add Narration
Unlike PhotoStory, there is no window to type your notes for narrating. You and your students will have to write them ahead of time and print them out or open them in a small window on your screen.

To record narration, click on the microphone button. Use your mouse to position the “red line” where you want to begin recording. When you click, you will get a 3 second countdown to begin recording. To stop recording, click the mouse button.
NOTE: In PhotoStory you only record one slide at a time. In iMovie if you don’t stop after each slide, your recording can flow into other slides. If this happens, you can adjust the length of each slide to fit the recording. In the picture below, notice that the voiceover (purple bar) for my third Millard Fillmore picture is 6.4 seconds long and the picture is only 4 seconds long.


Crop Images, Adjust Motion
Once you have adjusted the duration of your slides to match the voiceover, you can crop your images or adjust the pan and zoom. Click the crop button to make these adjustments.

You have three options.
- FIT - Make the entire picture fit in the window. You may see black bars on the sides or top & bottom.
- CROP - Crop the image so part of it fills the entire window.
- KEN BURNS - Make your image pan or zoom by setting a starting and ending point.
Unlike PhotoStory, iMovie does not have a music creator. To add music you must select it from your iTunes library or from the pre-made jingles found in the iLife sound effects folder.

For my President Riddle, I selected "Medal Ceremony", because it just sounds Presidential. The song will appear as a green field behind your pictures. If the song you choose is longer than your video, it will fade out at the end.
STEP 5: Save Your Video
This creates an Quicktime or m4v version of your video which will play in Quicktime Player or iTunes. Go to SHARE and select EXPORT MOVIE.

You can select different qualities and sizes. Because I want a smaller file size, I’ll pick “mobile” for my project.
Once the file has been exported, you can post it online or upload it to a video sharing site like YouTube or TeacherTube. Here’s what my finished project looks like.
iMovie 08 does much more than what is explained in this tutorial. If you want to learn more about iMovie 08, check out the video tutorials on Apple’s web site: http://www.apple.com/ilife/tutorials/#imovie
Sunday, November 11, 2007
A Not So Simple Solution
Sorry if this post gets a little more technical than usual. Sometimes there just doesn't seem to be a simple solution.
I really like Microsoft PhotoStory. It's a simple, easy tool that lets teachers and students create digital stories. What's not simple is trying to play these stories on a Mac. This has become a problem because some of our teachers like to post their PhotoStory files on their class web site. Parents with Macs at home can't view them.
Flip4Mac is a free Quicktime plugin that allows the Mac Quicktime player to play Windows Media files (wmv's) but for some reason it will not seem to play files created by PhotoStory. Real Player for Mac won't play them either.
After a some research I discovered something about the PhotoStory Video Codec. Apparently Microsoft PhotoStory 3 does NOT use the standard Windows Media Video (WMV) codec but a special codec developed for compressing still images: Windows Media Video 9 Image v2.
One solution for playing these files on a Mac is to convert them to .mov files. I've used Zamzar and that seems to work but the file size increases. My 6.5MB Photostory file converted to a 16.2MB .mov file. Even though the file size more than doubles, the picture quality of the converted file doesn't seem to be as good.
Another solution is to use use Windows Media Encoder (another free download from Microsoft) to convert your PhotoStory file to a file that will play on Quicktime with the Flip4Mac plug-in.
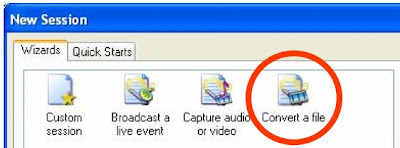
When you convert your file using Windows Media Encoder, use the following settings:
My 6.5MB photostory file converted to a 11.3MB wmv file that plays on my Mac.
Using media encoder seems to give me a better quality conversion and lower file size than using Zamzar and converting to a .mov file.
Now I just have to train our teachers to convert their completed video file before they post it online AND tell our Mac using parents that they need to download and install the Flip4Mac plug-in to view their class videos.
As I said, sometimes the solution is not that simple.
I really like Microsoft PhotoStory. It's a simple, easy tool that lets teachers and students create digital stories. What's not simple is trying to play these stories on a Mac. This has become a problem because some of our teachers like to post their PhotoStory files on their class web site. Parents with Macs at home can't view them.
Flip4Mac is a free Quicktime plugin that allows the Mac Quicktime player to play Windows Media files (wmv's) but for some reason it will not seem to play files created by PhotoStory. Real Player for Mac won't play them either.
After a some research I discovered something about the PhotoStory Video Codec. Apparently Microsoft PhotoStory 3 does NOT use the standard Windows Media Video (WMV) codec but a special codec developed for compressing still images: Windows Media Video 9 Image v2.
One solution for playing these files on a Mac is to convert them to .mov files. I've used Zamzar and that seems to work but the file size increases. My 6.5MB Photostory file converted to a 16.2MB .mov file. Even though the file size more than doubles, the picture quality of the converted file doesn't seem to be as good.
Another solution is to use use Windows Media Encoder (another free download from Microsoft) to convert your PhotoStory file to a file that will play on Quicktime with the Flip4Mac plug-in.

When you convert your file using Windows Media Encoder, use the following settings:
- For "Content Distribution" select - File Download (Computer Playback)
- For "Encoding Options" select...
- Video - VHS Quality (250 Kbps VBR)
- Audio - CD Quality (VBR)
My 6.5MB photostory file converted to a 11.3MB wmv file that plays on my Mac.
Using media encoder seems to give me a better quality conversion and lower file size than using Zamzar and converting to a .mov file.
Now I just have to train our teachers to convert their completed video file before they post it online AND tell our Mac using parents that they need to download and install the Flip4Mac plug-in to view their class videos.
As I said, sometimes the solution is not that simple.
Subscribe to:
Posts (Atom)


